Difference between revisions of "Begginer's Guide"
| [checked revision] | [checked revision] |
m |
Skilgannon (talk | contribs) |
||
| (3 intermediate revisions by the same user not shown) | |||
| Line 1: | Line 1: | ||
| + | ===Basic Knowledge=== | ||
| + | [[File:Begginer's Guide 01.jpg]] | ||
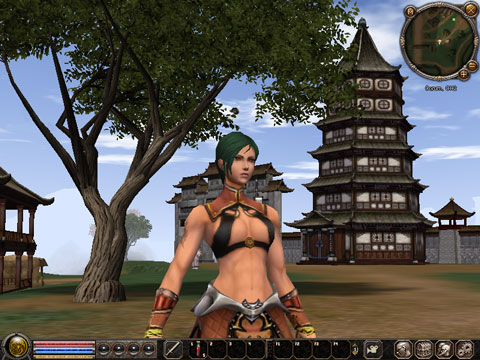
| − | + | After the game has loaded, your character will appear in the game world. Click on 'help' at the bottom left of the screen for a list of the basic game functions. | |
| − | |||
| − | |||
| − | + | The main element of the game will be explained in the following diagram. You can call up the help section in the game any time with the key 'H'. Aside from other information, the most important key short cuts will be listed here. It will also explain the best way to move your game character. You can either click the left the mouse button to get to your desired place or use the keys W, S, A and D. | |
| − | + | ||
| − | The | + | |
| + | [[File:Begginer's Guide 02.jpg]] | ||
| + | |||
| + | Close the help section and click on 'I' to open the inventory and equipment window. Click on the sword and drag it to the arm of the figure at the top or alternatively, double click on items to equip your character with armament. | ||
| + | The red potions that you receive at the beginning of the game will already be placed in the first fast access field. You can use items that you put there immediately (without having to access your inventory) by pressing the appropriate number. | ||
| + | |||
| + | |||
| + | |||
| + | [[File:Begginer's Guide 03.jpg]] | ||
| + | |||
| + | Now take a look around and move your character (zoom=mouse wheel). Hold down the right mouse button, take a panoramic view of the area and walk a few steps. Now you should be able to see other players and computer opponents (mobs) or computer navigated friends and retailers. If you press the 'Alt' key, you will see that the opponents in your area are titled in red. This will also show up if you run your cursor over the opponent or if you click the button 'Always show name' in the game options section. Don't worry, your opponents in this area will not attack you without a reason. | ||
| + | |||
| + | |||
| + | |||
| + | [[File:Begginer's Guide 04.jpg]] | ||
| + | |||
| + | Read your first mission by clicking on the 'Welcome to Metin2' scroll at the left side of the screen. At the top right corner of the mini map you will see a blinking dot, which is where you will need to go. The direction your character will need to go in will be displayed as a light coloured cone. By clicking on the '+' and '-' symbols you will be able to zoom in and out of the mini map. | ||
| + | |||
| + | |||
| − | + | [[File:Begginer's Guide 05.jpg]] | |
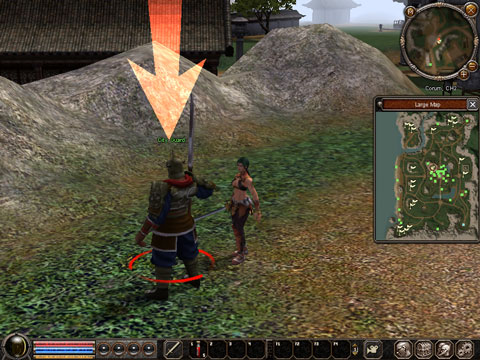
| + | Now you should proceed to the town guard. He will give you a new mission (quest). You will be able to see a quest giver from a distance because of the arrow pointing at it! Speak to the guard by clicking on him. | ||
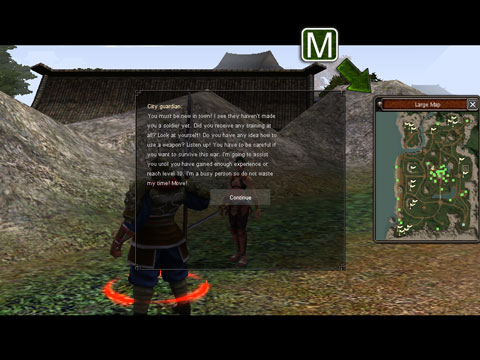
| + | Read the text that appears and then click on 'next'. Then you will find out what you mission is, find out what your reward will be or learn about any other missions (quests). | ||
| − | + | ||
| − | ' | + | [[File:Begginer's Guide 06.jpg]] |
| − | '' | + | Subsequently a large map will open up in which you will be able to view the area and view different paths in detail. You can fade the map in and out as you please with the 'M' (for map) key.Then you have to go to the guardian (in the middle of the settlement) and carry out a mission for him. |
| − | + | ||
| − | ' | + | [[File:Begginer's Guide 07.jpg]] |
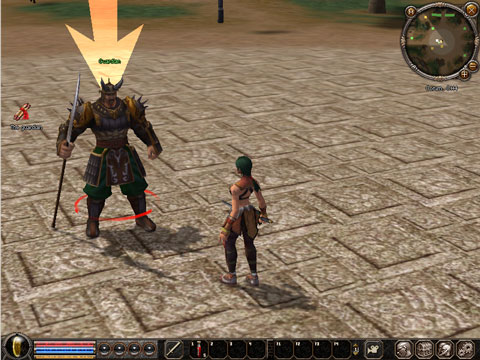
| − | + | Go to the guard of the village square and click on him. Your mission is: to buy potions for him! | |
| − | + | ||
| − | ' | + | [[File:Begginer's Guide 08.jpg]] |
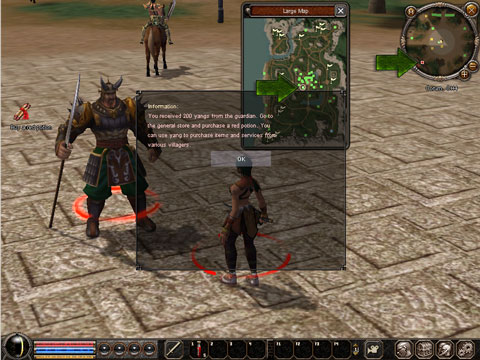
| − | + | You can find out where to buy it on this on the map, as well as on the mini map. Additionally you will receive an assignment scroll, which you can click on to find out more about your mission. So take on your computer operated persona (NPC = Non-Player-Character) to receive your potions. | |
| − | + | ||
| − | ' | + | [[File:Begginer's Guide 09.jpg]] |
| − | + | Click on the figure with the arrow and follow the dialogue. Walk back to the guard of the village square to deliver the potion to him. | |
| − | ' | + | |
| + | [[File:Begginer's Guide 10.jpg]] | ||
| − | + | You won't have to wait long to show off your strength and skill in your first battle! Because you successfully delivered the potion and received your own potion as a reward, you are now equipped well enough to start fighting! | |
| − | |||
| − | |||
| − | |||
| − | |||
| − | ' | + | [[File:Begginer's Guide 11.jpg]] |
| + | Go to the town gate where there are wild dogs and wolves. It's best to choose a group of wild dogs first. Your opponents only operate in groups of three and only attack at the same time. | ||
| − | + | Click on a wild dog to start a fight. The indicator above will tell you that you are fighting a wild dog of level 1. Because you are also on level 1, you should avoid fighting with opponents that are several levels above you. You character will now start attacking the group of wild dogs. Click on the dogs repeatedly until you have defeated them all or use the space bar to issue a sweeping attack to them. Alternatively you can click on the weapon icon in the lower half of your screen and choose 'automatic attack'- your character keeps on beating the opponent until he is dead, after which your character will focus on the next opponent. | |
| − | |||
| − | + | You can keep an eye of your vitality in the red bar at the bottom left of the screen. If all your vitality is gone, your character will die, can be reborn again though after ten seconds. As soon as you are not fighting any more, your character will regenerate itself. Any time during the game you can press '1', to drink from the red potion (regeneration). | |
| − | + | ||
| − | + | [[File:Begginer's Guide 12.jpg]] | |
| − | + | The more opponents you defeat, the more experience points you gain. These are symbolised by the four pellets on the right next to your vitality indicator. When all pellets are filled, you move up a level. With every pellet filled you gain one point. | |
| − | + | ||
| − | + | [[File:Begginer's Guide 13.jpg]] | |
| − | |||
| − | |||
| − | |||
| − | '' | + | These points enable you to improve particular attributes. Click on the plus symbol or press the 'C' key to open the character window. On the screen you can see that you have one character point available. Assign it to one of the four attributes by clicking on the small plus symbol. Depending on the attribute you have chosen, you can either become tougher (= more life points), stronger (= more damage) or more skilful (= better evasion). |
| − | ' | + | |
| + | |||
| + | [[File:Begginer's Guide 14.jpg]] | ||
| + | |||
| + | Often opponents can loose things if they have lost a battle. This can be either money (Yang) or items. Click on them to pick them up or press the key '^', if you are standing next to it. | ||
| + | |||
| + | |||
| − | + | [[File:Begginer's Guide 15.jpg]] | |
| − | '' | + | In the inventory 'I' you can see what currently belongs to you- including your looted Yang at the bottom right of the screen. You can also put on or change your equipment. You will receive additional equipment items if you have defeated an opponent. However, you cannot have every item, as they are dependant on your class and level. |
| − | |||
| − | |||
| − | + | Now carry on fighting! When you have filled all four experience cones, you will move up a level and receive new missions. | |
| − | + | [[File:Begginer's Guide 16.jpg]] | |
| − | |||
| − | |||
| − | |||
| − | |||
| − | '' | + | Again, you can view directions on the map ('M'). The button 'N' opens the overview of all your incomplete missions. |
| − | |||
| − | |||
| − | |||
| − | |||
| − | + | ||
| − | + | [[File:Begginer's Guide 17.jpg]] | |
| − | + | This is the end of the introduction. Now you can go searching for adventures. There are so many more things to discover- we have only scratched the surface. | |
Latest revision as of 01:22, 4 March 2013
Basic Knowledge
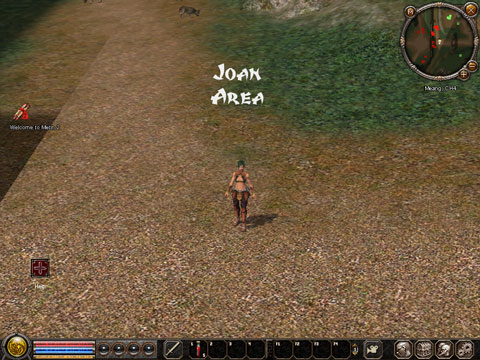
After the game has loaded, your character will appear in the game world. Click on 'help' at the bottom left of the screen for a list of the basic game functions.
The main element of the game will be explained in the following diagram. You can call up the help section in the game any time with the key 'H'. Aside from other information, the most important key short cuts will be listed here. It will also explain the best way to move your game character. You can either click the left the mouse button to get to your desired place or use the keys W, S, A and D.
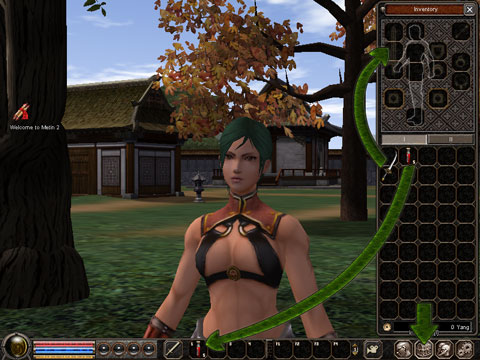
Close the help section and click on 'I' to open the inventory and equipment window. Click on the sword and drag it to the arm of the figure at the top or alternatively, double click on items to equip your character with armament. The red potions that you receive at the beginning of the game will already be placed in the first fast access field. You can use items that you put there immediately (without having to access your inventory) by pressing the appropriate number.
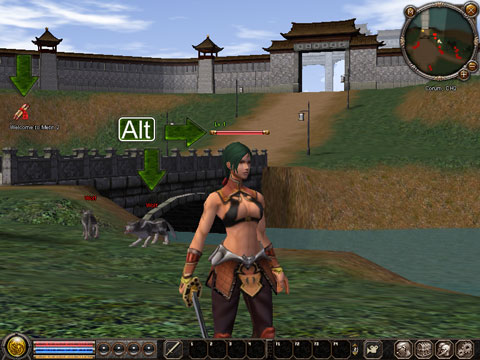
Now take a look around and move your character (zoom=mouse wheel). Hold down the right mouse button, take a panoramic view of the area and walk a few steps. Now you should be able to see other players and computer opponents (mobs) or computer navigated friends and retailers. If you press the 'Alt' key, you will see that the opponents in your area are titled in red. This will also show up if you run your cursor over the opponent or if you click the button 'Always show name' in the game options section. Don't worry, your opponents in this area will not attack you without a reason.
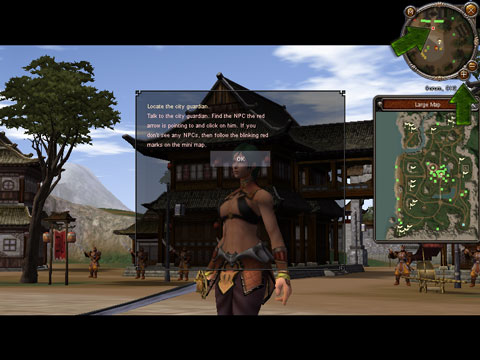
Read your first mission by clicking on the 'Welcome to Metin2' scroll at the left side of the screen. At the top right corner of the mini map you will see a blinking dot, which is where you will need to go. The direction your character will need to go in will be displayed as a light coloured cone. By clicking on the '+' and '-' symbols you will be able to zoom in and out of the mini map.
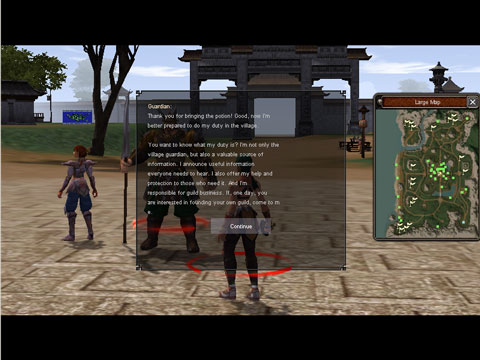
Now you should proceed to the town guard. He will give you a new mission (quest). You will be able to see a quest giver from a distance because of the arrow pointing at it! Speak to the guard by clicking on him. Read the text that appears and then click on 'next'. Then you will find out what you mission is, find out what your reward will be or learn about any other missions (quests).
Subsequently a large map will open up in which you will be able to view the area and view different paths in detail. You can fade the map in and out as you please with the 'M' (for map) key.Then you have to go to the guardian (in the middle of the settlement) and carry out a mission for him.
Go to the guard of the village square and click on him. Your mission is: to buy potions for him!
You can find out where to buy it on this on the map, as well as on the mini map. Additionally you will receive an assignment scroll, which you can click on to find out more about your mission. So take on your computer operated persona (NPC = Non-Player-Character) to receive your potions.
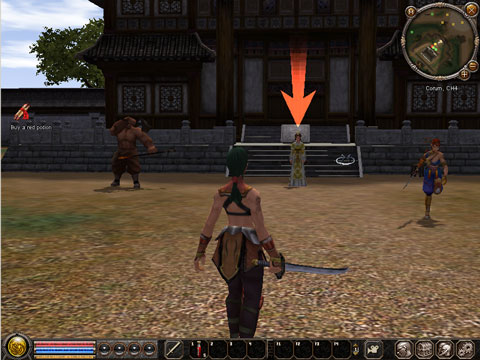
Click on the figure with the arrow and follow the dialogue. Walk back to the guard of the village square to deliver the potion to him.
You won't have to wait long to show off your strength and skill in your first battle! Because you successfully delivered the potion and received your own potion as a reward, you are now equipped well enough to start fighting!
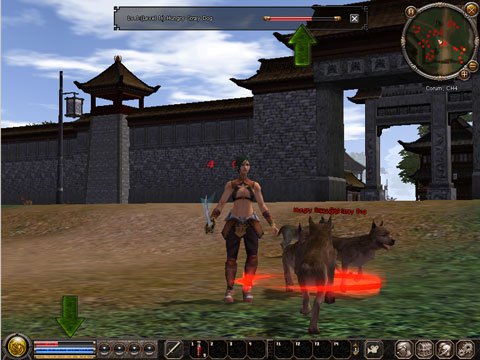
Go to the town gate where there are wild dogs and wolves. It's best to choose a group of wild dogs first. Your opponents only operate in groups of three and only attack at the same time.
Click on a wild dog to start a fight. The indicator above will tell you that you are fighting a wild dog of level 1. Because you are also on level 1, you should avoid fighting with opponents that are several levels above you. You character will now start attacking the group of wild dogs. Click on the dogs repeatedly until you have defeated them all or use the space bar to issue a sweeping attack to them. Alternatively you can click on the weapon icon in the lower half of your screen and choose 'automatic attack'- your character keeps on beating the opponent until he is dead, after which your character will focus on the next opponent.
You can keep an eye of your vitality in the red bar at the bottom left of the screen. If all your vitality is gone, your character will die, can be reborn again though after ten seconds. As soon as you are not fighting any more, your character will regenerate itself. Any time during the game you can press '1', to drink from the red potion (regeneration).
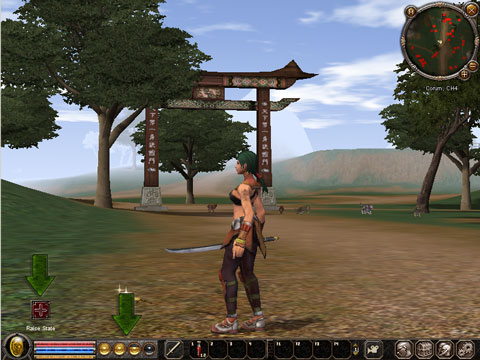
The more opponents you defeat, the more experience points you gain. These are symbolised by the four pellets on the right next to your vitality indicator. When all pellets are filled, you move up a level. With every pellet filled you gain one point.
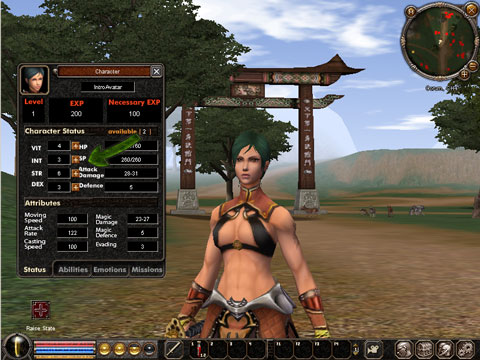
These points enable you to improve particular attributes. Click on the plus symbol or press the 'C' key to open the character window. On the screen you can see that you have one character point available. Assign it to one of the four attributes by clicking on the small plus symbol. Depending on the attribute you have chosen, you can either become tougher (= more life points), stronger (= more damage) or more skilful (= better evasion).
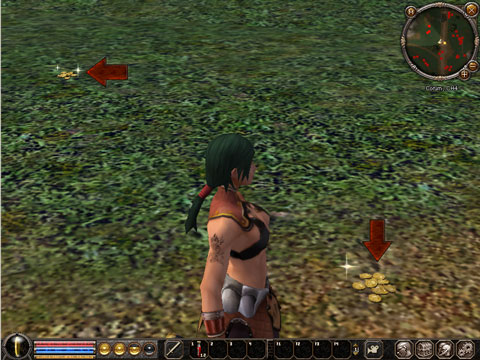
Often opponents can loose things if they have lost a battle. This can be either money (Yang) or items. Click on them to pick them up or press the key '^', if you are standing next to it.
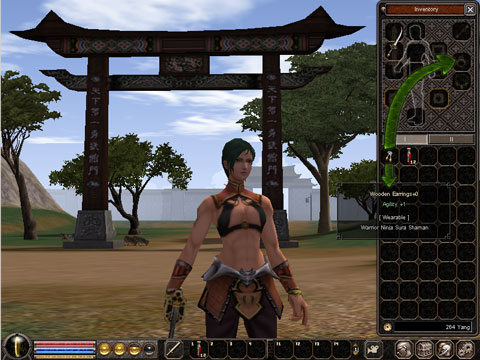
In the inventory 'I' you can see what currently belongs to you- including your looted Yang at the bottom right of the screen. You can also put on or change your equipment. You will receive additional equipment items if you have defeated an opponent. However, you cannot have every item, as they are dependant on your class and level.
Now carry on fighting! When you have filled all four experience cones, you will move up a level and receive new missions.
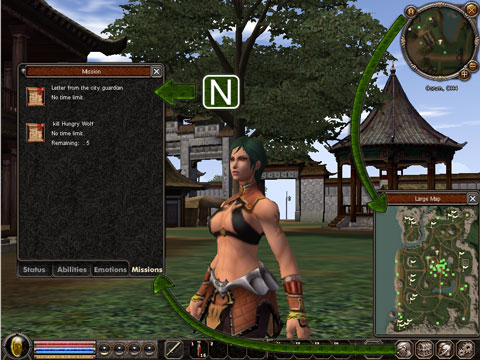
Again, you can view directions on the map ('M'). The button 'N' opens the overview of all your incomplete missions.
This is the end of the introduction. Now you can go searching for adventures. There are so many more things to discover- we have only scratched the surface.
