Difference between revisions of "Shoulder Sash System"
| [checked revision] | [checked revision] |
m (→Improving the Shoulder Sashes - Combining) |
m (→All Sashes) |
||
| (7 intermediate revisions by the same user not shown) | |||
| Line 14: | Line 14: | ||
== How to get a Shoulder Sash == | == How to get a Shoulder Sash == | ||
*There are quite some shoulder sashes to choose from. | *There are quite some shoulder sashes to choose from. | ||
| − | * | + | *{{Ti|Master Sash (basic)}} is a reward for the repeatable quest [[A special cloth]] (level 40). |
| − | *{{Ti|Lord Sash (basic)}} can be bought in [[Item-Shop]] for 49 DC | + | *{{Ti|Lord Sash (basic)}} can be bought in [[Item-Shop]] for 49 DC. |
| − | *{{Ti| | + | *{{Ti|Anniversary Sash (basic)}} can be claimed during [[Anniversary]]. |
| − | + | *{{Ti|Heart Sash (basic)}} is exclusive during [[Valentine's Day Event]]. | |
| + | *{{Ti|Aventurine Treasure}}, {{Ti|Aureolin Treasure}}, {{Ti|Astral Treasure}}, {{Ti|Sash Box}} and {{Ti|Large Sash Box}} drops several sashes of different grades. | ||
| + | *Down the page you will find a table with all existing sashes. Click on the sash to learn more about origins. | ||
<br><br> | <br><br> | ||
| Line 29: | Line 31: | ||
*The sashes being used will be highlighted in inventory [[File:Highlighted sash.png|25px|link=]] | *The sashes being used will be highlighted in inventory [[File:Highlighted sash.png|25px|link=]] | ||
*A custom sash can be improved by combining it with another custom sash, in case of success the improvement will increase the absorption rate from 1 to 5%. | *A custom sash can be improved by combining it with another custom sash, in case of success the improvement will increase the absorption rate from 1 to 5%. | ||
| − | *A custom shoulder sash with | + | *If there is already an item absorbed to the sash, it will improve its stats when you upgrade the shoulder sash. |
| + | *A custom shoulder sash with an absorption rate of 19% or higher will have a shining effect. | ||
<br><br><br><br><br><br> | <br><br><br><br><br><br> | ||
| − | == Bonus | + | == Bonus absorption == |
[[File:Bonus absorption screen.png|thumb|link=]] | [[File:Bonus absorption screen.png|thumb|link=]] | ||
*You can use a sash to absorb the bonus from any weapon or armour. | *You can use a sash to absorb the bonus from any weapon or armour. | ||
| Line 101: | Line 104: | ||
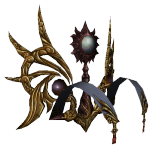
File:IG-Shen Sash (custom).png|link=Shen Sash (custom)|{{Ti|Shen Sash (custom)}} | File:IG-Shen Sash (custom).png|link=Shen Sash (custom)|{{Ti|Shen Sash (custom)}} | ||
File:IG-Wu Sash (basic).png|link=Wu Sash (basic)|{{Ti|Wu Sash (basic)}} | File:IG-Wu Sash (basic).png|link=Wu Sash (basic)|{{Ti|Wu Sash (basic)}} | ||
| − | File:IG-Wu Sash (fine).png|Wu Sash (fine)|{{Ti|Wu Sash (fine)}} | + | File:IG-Wu Sash (fine).png|link=Wu Sash (fine)|{{Ti|Wu Sash (fine)}} |
| − | File:IG-Wu Sash (noble).png|Wu Sash (noble)|{{Ti|Wu Sash (noble)}} | + | File:IG-Wu Sash (noble).png|link=Wu Sash (noble)|{{Ti|Wu Sash (noble)}} |
| − | File:IG-Wu Sash (custom).png|Wu Sash (custom)|{{Ti|Wu Sash (custom)}} | + | File:IG-Wu Sash (custom).png|link=Wu Sash (custom)|{{Ti|Wu Sash (custom)}} |
| − | File:IG-Yin Sash (basic).png|Yin Sash (basic)|{{Ti|Yin Sash (basic)}} | + | File:IG-Yin Sash (basic).png|link=Yin Sash (basic)|{{Ti|Yin Sash (basic)}} |
| − | File:IG-Yin Sash (fine).png|Yin Sash (fine)|{{Ti|Yin Sash (fine)}} | + | File:IG-Yin Sash (fine).png|link=Yin Sash (fine)|{{Ti|Yin Sash (fine)}} |
| − | File:IG-Yin Sash (noble).png|Yin Sash (noble)|{{Ti|Yin Sash (noble)}} | + | File:IG-Yin Sash (noble).png|link=Yin Sash (noble)|{{Ti|Yin Sash (noble)}} |
| − | File:IG-Yin Sash (custom).png|Yin Sash (custom)|{{Ti|Yin Sash (custom)}} | + | File:IG-Yin Sash (custom).png|link=Yin Sash (custom)|{{Ti|Yin Sash (custom)}} |
| − | File:IG-Chou Sash (basic).png|Chou Sash (basic)|{{Ti|Chou Sash (basic)}} | + | File:IG-Chou Sash (basic).png|link=Chou Sash (basic)|{{Ti|Chou Sash (basic)}} |
| − | File:IG-Chou Sash (fine).png|Chou Sash (fine)|{{Ti|Chou Sash (fine)}} | + | File:IG-Chou Sash (fine).png|link=Chou Sash (fine)|{{Ti|Chou Sash (fine)}} |
| − | File:IG-Chou Sash (noble).png|Chou Sash (noble)|{{Ti|Chou Sash (noble)}} | + | File:IG-Chou Sash (noble).png|link=Chou Sash (noble)|{{Ti|Chou Sash (noble)}} |
| − | File:IG-Chou Sash (custom).png|Chou Sash (custom)|{{Ti|Chou Sash (custom)}} | + | File:IG-Chou Sash (custom).png|link=Chou Sash (custom)|{{Ti|Chou Sash (custom)}} |
| − | File:IG-Mao Sash (basic).png|Mao Sash (basic)|{{Ti|Mao Sash (basic)}} | + | File:IG-Mao Sash (basic).png|link=Mao Sash (basic)|{{Ti|Mao Sash (basic)}} |
| − | File:IG-Mao Sash (fine).png|Mao Sash (fine)|{{Ti|Mao Sash (fine)}} | + | File:IG-Mao Sash (fine).png|link=Mao Sash (fine)|{{Ti|Mao Sash (fine)}} |
| − | File:IG-Mao Sash (noble).png|Mao Sash (noble)|{{Ti|Mao Sash (noble)}} | + | File:IG-Mao Sash (noble).png|link=Mao Sash (noble)|{{Ti|Mao Sash (noble)}} |
| − | File:IG-Mao Sash (custom).png|Mao Sash (custom)|{{Ti|Mao Sash (custom)}} | + | File:IG-Mao Sash (custom).png|link=Mao Sash (custom)|{{Ti|Mao Sash (custom)}} |
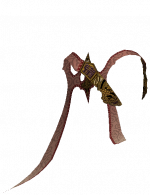
| − | File:IG-Si Sash (basic).png|Si Sash (basic)|{{Ti|Si Sash (basic)}} | + | File:IG-Si Sash (basic).png|link=Si Sash (basic)|{{Ti|Si Sash (basic)}} |
| − | File:IG-Si Sash (fine).png|Si Sash (fine)|{{Ti|Si Sash (fine)}} | + | File:IG-Si Sash (fine).png|link=Si Sash (fine)|{{Ti|Si Sash (fine)}} |
| − | File:IG-Si Sash (noble).png|Si Sash (noble)|{{Ti|Si Sash (noble)}} | + | File:IG-Si Sash (noble).png|link=Si Sash (noble)|{{Ti|Si Sash (noble)}} |
| − | File:IG-Si Sash (custom).png|Si Sash (custom)|{{Ti|Si Sash (custom)}} | + | File:IG-Si Sash (custom).png|link=Si Sash (custom)|{{Ti|Si Sash (custom)}} |
| − | File:IG-Wei Sash (basic).png|Wei Sash (basic)|{{Ti|Wei Sash (basic)}} | + | File:IG-Wei Sash (basic).png|link=Wei Sash (basic)|{{Ti|Wei Sash (basic)}} |
| − | File:IG-Wei Sash (fine).png|Wei Sash (fine)|{{Ti|Wei Sash (fine)}} | + | File:IG-Wei Sash (fine).png|link=Wei Sash (fine)|{{Ti|Wei Sash (fine)}} |
| − | File:IG-Wei Sash (noble).png|Wei Sash (noble)|{{Ti|Wei Sash (noble)}} | + | File:IG-Wei Sash (noble).png|link=Wei Sash (noble)|{{Ti|Wei Sash (noble)}} |
| − | File:IG-Wei Sash (custom).png|Wei Sash (custom)|{{Ti|Wei Sash (custom)}} | + | File:IG-Wei Sash (custom).png|link=Wei Sash (custom)|{{Ti|Wei Sash (custom)}} |
| − | File:IG-You Sash (basic).png|Yin Sash (basic)|{{Ti|You Sash (basic)}} | + | File:IG-You Sash (basic).png|link=Yin Sash (basic)|{{Ti|You Sash (basic)}} |
| − | File:IG-You Sash (fine).png|Yin Sash (fine)|{{Ti|You Sash (fine)}} | + | File:IG-You Sash (fine).png|link=Yin Sash (fine)|{{Ti|You Sash (fine)}} |
| − | File:IG-You Sash (noble).png|Yin Sash (noble)|{{Ti|You Sash (noble)}} | + | File:IG-You Sash (noble).png|link=Yin Sash (noble)|{{Ti|You Sash (noble)}} |
| − | File:IG-You Sash (custom).png|Yin Sash (custom)|{{Ti|You Sash (custom)}} | + | File:IG-You Sash (custom).png|link=Yin Sash (custom)|{{Ti|You Sash (custom)}} |
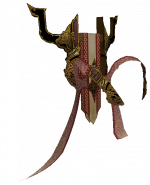
| − | File:IG-Hai Sash (basic).png|Hai Sash (basic)|{{Ti|Hai Sash (basic)}} | + | File:IG-Hai Sash (basic).png|link=Hai Sash (basic)|{{Ti|Hai Sash (basic)}} |
| − | File:IG-Hai Sash (fine).png|Hai Sash (fine)|{{Ti|Hai Sash (fine)}} | + | File:IG-Hai Sash (fine).png|link=Hai Sash (fine)|{{Ti|Hai Sash (fine)}} |
| − | File:IG-Hai Sash (noble).png|Hai Sash (noble)|{{Ti|Hai Sash (noble)}} | + | File:IG-Hai Sash (noble).png|link=Hai Sash (noble)|{{Ti|Hai Sash (noble)}} |
| − | File:IG-Hai Sash (custom).png|Hai Sash (custom)|{{Ti|Hai Sash (custom)}} | + | File:IG-Hai Sash (custom).png|link=Hai Sash (custom)|{{Ti|Hai Sash (custom)}} |
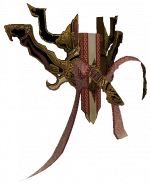
| − | File:IG-Heart Sash (basic).png|Heart Sash (basic)|{{Ti|Heart Sash (basic)}} | + | File:IG-Heart Sash (basic).png|link=Heart Sash (basic)|{{Ti|Heart Sash (basic)}} |
| − | File:IG-Heart Sash (fine).png|Heart Sash (fine)|{{Ti|Heart Sash (fine)}} | + | File:IG-Heart Sash (fine).png|link=Heart Sash (fine)|{{Ti|Heart Sash (fine)}} |
| − | File:IG-Heart Sash (noble).png|Heart Sash (noble)|{{Ti|Heart Sash (noble)}} | + | File:IG-Heart Sash (noble).png|link=Heart Sash (noble)|{{Ti|Heart Sash (noble)}} |
| − | File:IG-Heart Sash (custom).png|Heart Sash (custom)|{{Ti|Heart Sash (custom)}} | + | File:IG-Heart Sash (custom).png|link=Heart Sash (custom)|{{Ti|Heart Sash (custom)}} |
</gallery> | </gallery> | ||
| + | |||
| + | [[Category:Infos]] | ||
[[ae:نظام وشاح الكتف]] | [[ae:نظام وشاح الكتف]] | ||
Latest revision as of 23:45, 21 February 2026

Contents
General

- The shoulder sash system was implemented in 10.03.2015
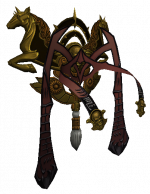
- The shoulder sash is a piece of visible equipment just like the armour and weapon.
- The shoulder sash is equipped in costume inventory (see right) in slot 6, which opens with the
 button in the players Inventory.
- 1, 2 and 3 belong to the Costume System, 4 Mounts and 5 Aura Outfits
- Shoulder Sashes do not expire.
- Can be equipped from level 1.
- Only the sashes from "Custom" level can be traded.
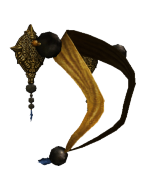
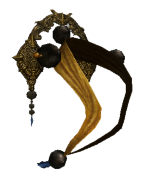
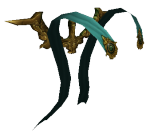
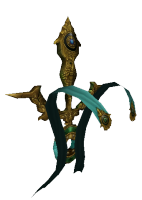
How to get a Shoulder Sash
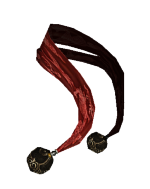
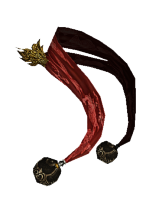
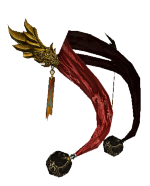
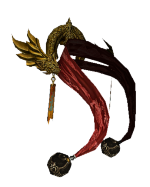
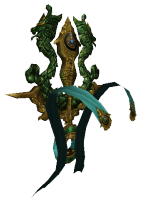
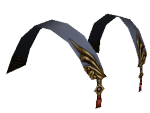
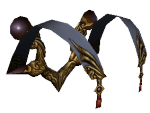
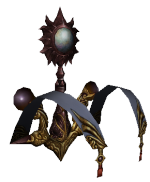
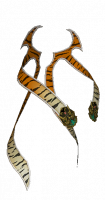
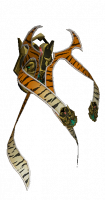
- There are quite some shoulder sashes to choose from.

 Master Sash (basic) is a reward for the repeatable quest A special cloth (level 40).
 Lord Sash (basic) can be bought in Item-Shop for 49 DC.
 Anniversary Sash (basic) can be claimed during Anniversary.
 Heart Sash (basic) is exclusive during Valentine's Day Event.
 Aventurine Treasure,
  Aureolin Treasure,
  Astral Treasure,
  Sash Box and
  Large Sash Box drops several sashes of different grades.
- Down the page you will find a table with all existing sashes. Click on the sash to learn more about origins.
Improving the Shoulder Sashes - Combining
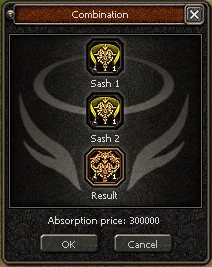
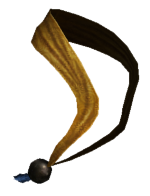
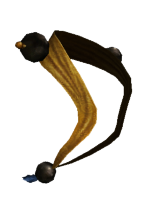
- The shoulder sashes have 4 different grades of quality: basic, fine, noble and custom.
- Sashes of the same grade of quality can be combined to craft to a higher quality sash.
- The refinement can fail, when it does, the bottom sash is destroyed, the top one is kept.
- The combination screen is obtained from the dialog option 'Combination' from .
- Add the sash you wish to upgrade to the top slot, add a second one to combine to the bottom slot.
- The sashes being used will be highlighted in inventory

- A custom sash can be improved by combining it with another custom sash, in case of success the improvement will increase the absorption rate from 1 to 5%.
- If there is already an item absorbed to the sash, it will improve its stats when you upgrade the shoulder sash.
- A custom shoulder sash with an absorption rate of 19% or higher will have a shining effect.
Bonus absorption
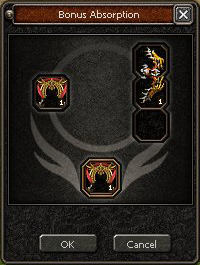
- You can use a sash to absorb the bonus from any weapon or armour.
- The armour or weapon used to be absorbed will be destroyed.
- Basic sashes absorb 1% of the bonus from armour or weapon.
- Fine sashes absorb 5% of the bonus from armour or weapon.
- Noble sashes absorb 10% of the bonus from armour or weapon.
- Custom sashes absorb 11 to 25% of the bonus from armour or weapon (the % is set when the sash is made).
- Go to Theowahdan and select the option 'Absorption of bonuses'.
- Place the sash on the left slot, the weapon or armour on the right slot, and you can see the final result on the bottom.
- The process will transfer the % of both bonus and stats of the weapon/armour.
- This method cannot fail.
Bonus removal
- The bonuses from a sash can be removed using
 Certificate of Reversal or
  Certificate of Reversal+.
Bonus transfer
- Since version 18.4 it is possible to transfer the bonuses from one sash to another:
- Go to and select the option 'Transfer Bonuses'.
- Drag the
 Shoulder Sash Transfer to the slot.
 - Place the sash with good bonuses to the right and the target sash to the left.
- Both sashes need to have the same absorption rate.
- There is a chance of (partial) success. In case of failure, the absorption rate of the old sash is reduced by 1%.
- In case of partial success, the transfer was successful but the absorption rate of the new sash is reduced by 1%.
- In case of full success, the transfer was successful and the absorption rate did not change.


